
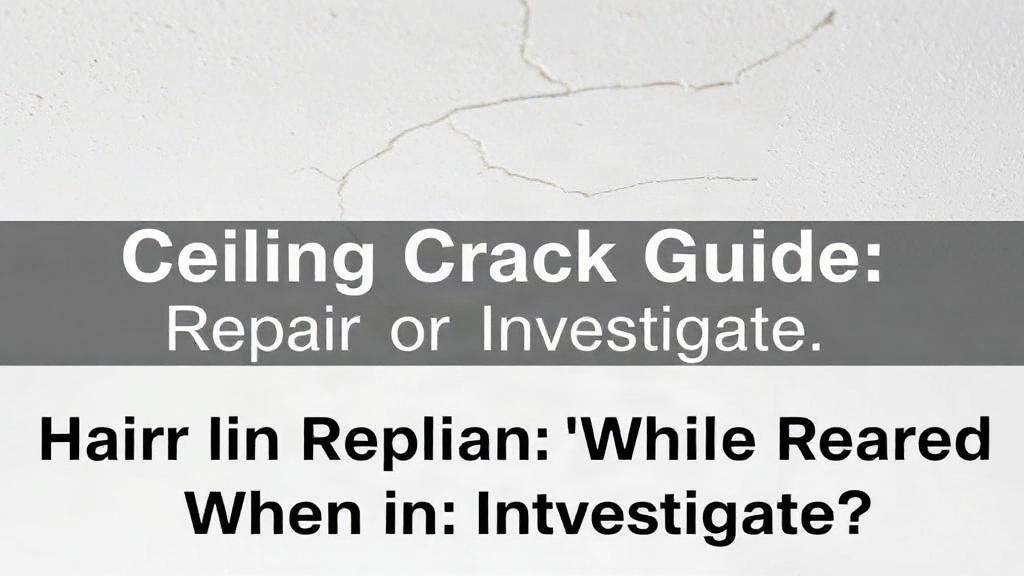
You glance up one morning and spot a thin, branching line across the ceiling paint. Is it cosmetic wear, or the first sign of something serious? Knowing how to read hairline cracks in ceiling: when to repair and when to investigate saves you from both needless worry and expensive neglect.
Quick answer: Most thin cracks that follow straight lines or look like spiderwebs are cosmetic and safe to patch. Call a professional if a crack is wider than a coin edge, keeps growing, or comes with sagging, water stains, or doors that suddenly stick. The pattern and the context tell you more than the width alone.
This guide explains what different crack patterns mean, why they matter, and how to handle each one. You will finish with a clear checklist for deciding whether to reach for the filler or the phone.
What is Hairline Cracks in Ceiling: When to Repair and When to Investigate?
A hairline crack is a narrow split in plaster, drywall, or ceiling paint, usually under one millimeter wide. Most appear as fine lines, spider veins, or faint hairlines rather than open gaps.
These cracks fall into two broad groups.
- Cosmetic cracks sit in the surface layers. Paint and joint compound dry out, shrink, and split as a building settles.
- Structural cracks start in the framing or substrate and push through the finish. They often widen over time.
The pattern is your best clue. Straight cracks along drywall seams usually follow taped joints that moved slightly. Spiderweb cracks radiate from a point where the surface flexed. Long cracks running across a whole room deserve a closer look.
Age and construction type shape what is normal. New homes often show cracks in the first year as lumber dries and framing settles. Older plaster ceilings crack as the keys that hold them in place loosen.
Location matters too. Cracks near ceiling corners, around light fixtures, or above doorways reflect normal stress points. A crack in the middle of a flat, undisturbed field of ceiling is less routine.
A crack that appeared once and stayed identical for years is far less concerning than one that grows a little every month. Time is a diagnostic tool you already own.
The practical skill is comparison. Photograph each crack, note the date, and check again in four to six weeks. Movement you can measure is the strongest signal that repair alone will not solve the problem.
Record the light, too. A crack photographed at night under a lamp looks different from one seen in daylight, and shadows exaggerate depth. Keep the same angle and lighting for every check so comparisons stay honest.
Why Hairline Cracks in Ceiling: When to Repair and When to Investigate matters

Ignoring a cosmetic crack costs you little beyond appearance. Ignoring a structural one can mean water damage, sagging drywall, or costly repairs that a small early fix would have prevented.
Water is the most common hidden culprit. A slow leak above a ceiling often shows as a faint crack or stain before any drip appears. By the time water runs through, the drywall may already be soft and mold may be growing.
Cracks also affect safety. A ceiling that sags along a crack can indicate failing fasteners or waterlogged material. Drywall sheets are heavy, and a section that pulls loose without warning is a genuine hazard.
Money is the other reason. Patching a cosmetic crack takes a tube of filler and an afternoon. Fixing a leak-triggered collapse can mean replacing drywall, insulation, and sometimes framing. Early judgment keeps the cost on the small side.
Cracks can signal wider building movement. Doors that suddenly stick, gaps at baseboards, or cracks over window corners suggest foundation or framing shifts. Those issues rarely fix themselves.
If a ceiling section feels soft, bows downward, or sounds hollow when tapped, keep people clear and call a professional. Do not patch over it as a cosmetic fix.
There is a practical value in knowing the difference, too. Over-investigating every thin line wastes money on inspections. Under-investigating genuine warning signs risks much more. A simple framework for reading cracks gets the balance right.
Think of it as a triage system rather than a yes-or-no question. Cosmetic lines get a patch and a calendar reminder; ambiguous ones get monitoring; clear warning signs get a call within days, not months. Writing that decision down, and sticking to it, prevents both panic-driven spending and the slow drift toward neglect that turns a small fix into a major one.
Best practices
Good repair starts with diagnosis, not with the tube of filler. Follow these steps in order and you will rarely misjudge a crack.
Start with a moisture meter if you own one, or borrow one from a hardware store. Readings well above normal confirm dampness behind the paint before any stain appears. Note the number beside your photo; it becomes a baseline for later checks.
Step 1: Inspect before you fill
Look closely at the crack with a flashlight held at a low angle. Note its width, length, and direction. Check for water stains, discoloration, or softness around it. Run your hand along the surface to feel for swelling or bulging.
Step 2: Document and monitor
Take a dated photo with a ruler or coin beside the crack for scale. Write the date on a note. Check again in a month and compare. A crack that has not changed is usually cosmetic.
Step 3: Repair cosmetic cracks correctly
Shallow surface cracks respond well to flexible filler. Here is a simple method:
- Scrape out loose paint or compound with a putty knife.
- Apply a paintable flexible caulk or lightweight spackle.
- Press paper joint tape over wider hairline cracks and feather the edges.
- Sand smooth once dry and repaint with a primer and matching topcoat.
Flexible filler outperforms rigid spackle on cracks that might still move slightly.
Step 4: Investigate warning signs
Call a professional when you see any of the following:
- A crack wider than about 3 mm, or one you can fit a coin edge into
- A crack that keeps growing between checks
- Sagging, softness, or a hollow sound
- Water stains or a musty smell
- Cracks paired with sticking doors or new gaps elsewhere
An inspector can trace the cause, whether that is a roof leak, plumbing, or foundation movement.
Step 5: Fix the cause before the surface
Patching a crack without repairing the leak or movement above it is wasted effort. The crack will return, often within a single season. Solve the source, then finish the ceiling.
Use flexible acrylic caulk for moving joints and patching compound for stable surfaces. Matching the product to the movement prevents repeat cracks.
Common mistakes to avoid
Most failed ceiling repairs trace back to a handful of avoidable errors. Catching these before you start saves a second trip up the ladder.
Patching without finding the cause. Filling a crack that stems from a leak or movement hides the symptom for a few months. The crack returns, often larger. Diagnose first, then repair.
Using rigid filler on a moving joint. Hard spackle cracks again when the surface flexes. Flexible caulk and tape handle small movement far better.
Skipping the primer. Fresh compound absorbs paint unevenly, so the patch shows through as a dull spot. A coat of primer seals the area before the topcoat.
Ignoring width and growth. A crack that measures more than a few millimeters or keeps widening needs professional eyes. Treating it as cosmetic risks a bigger failure.
Overlooking water signs. A faint brown ring beside a crack usually means moisture. Patching over it traps dampness and can lead to mold. Find and stop the leak first.
Assuming all cracks are harmless. Some hairline cracks are genuinely cosmetic. Others signal foundation or framing trouble. The pattern and context decide which is which.
Not keeping records. Without photos and dates, you cannot tell whether a crack is stable or slowly growing. A simple log makes the judgment easy.
Mixing products on one repair. Caulk and spackle shrink and sand differently, so a patch that combines them can telegraph through the new paint. Pick one system and carry it across the whole crack. Repairing in the wrong conditions. Filler applied to a damp or dusty surface bonds poorly and fails within months. Wipe the area, let it dry fully, and avoid painting in cold or humid weather.
A short inspection costs far less than a collapsed ceiling section. If a crack worries you, treat that instinct as useful information.
FAQ
How wide is too wide for a hairline crack?
Most hairline cracks measure under one millimeter. Treat anything wider than about 3 mm, or a crack you can slip a coin edge into, as a signal to call a professional. Width alone matters less than growth, so measure and recheck over time.
Can I just paint over a hairline ceiling crack?
Paint will hide a cosmetic crack briefly, but it will not stop it. The paint film splits again as the surface moves. Fill the crack with flexible compound, sand it smooth, and prime before repainting for a lasting fix.
How do I tell a water leak from a settling crack?
Water damage usually leaves a brown or yellowish stain, a soft or swollen surface, or a musty smell. Settling cracks tend to look dry and clean. Any moisture sign means you should find the leak before you repair the ceiling.
Should I worry about cracks after a new build?
Some cracking in the first year is normal as lumber dries and the structure settles. Short, stable cracks are usually cosmetic. Cracks that keep widening or appear alongside sticking doors deserve an inspection.
How much does a ceiling crack inspection cost?
Costs vary widely by region and the type of specialist, so ask for quotes from local inspectors or contractors. Compare the fee against the potential cost of hidden water or structural damage. An inspection is usually the cheaper path.
Will repairing a crack stop it from coming back?
Only if you address the cause. A cosmetic crack on a stable surface stays fixed after a proper patch. A crack caused by movement, moisture, or framing issues returns unless that underlying problem is solved first.
Conclusion
Most hairline ceiling cracks are harmless surface splits you can patch in an afternoon. The ones that matter share clear warning signs: they widen, they stain, they sag, or they come with other movement in the house. Use photos and dates to track them, match your filler to the movement, and fix causes before surfaces.
Your next step is simple. Photograph every crack you can see today, then check them again in a month. Anything that has grown or shows moisture deserves a professional look, while the stable ones are ready for a quick, well-executed patch.
You May Like
Can You Use Push Fit Fittings on Copper Pipe? What You Need to Know