
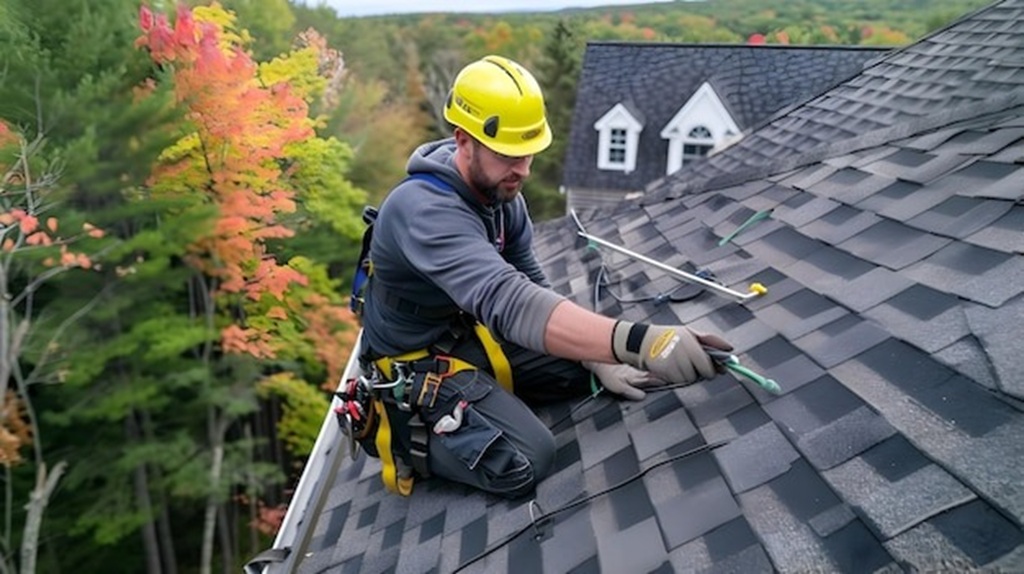
Installing a roof vent is a crucial upgrade for any home, especially in climates prone to extreme temperatures or humidity. Proper ventilation helps regulate attic temperature, prevent moisture buildup, and extend the lifespan of your roofing materials. However, tackling this project on an existing roof can seem daunting. This comprehensive guide will walk you through the process, from planning and preparation to the final sealing, ensuring a successful and long-lasting installation.
Understanding the Importance of Roof Ventilation

Before diving into the installation process, it’s essential to understand why roof ventilation matters. Inadequate ventilation can lead to a host of problems, including:
- Moisture Buildup: Warm, moist air rising from your living space can condense in the attic, leading to mold growth, rot, and insulation damage.
- Increased Energy Costs: Poor ventilation forces your HVAC system to work harder, resulting in higher energy bills.
- Roof Damage: Excessive heat can warp shingles, shorten their lifespan, and cause premature roof deterioration.
- Ice Dams: In colder climates, warm air escaping into the attic can melt snow on the roof, which refreezes at the eaves, forming ice dams that can damage your roof and gutters.
Proper ventilation creates a balanced airflow, allowing hot, moist air to escape while drawing in cooler, drier air. This helps maintain a consistent attic temperature and prevents moisture-related issues.
Planning and Preparation: The Key to Success
Installing a roof vent requires careful planning and preparation. Here’s a breakdown of the essential steps:
- Determine the Type of Vent: There are various types of roof vents, including ridge vents, box vents, turbine vents, and solar-powered vents. Choose the type that best suits your roof design, climate, and ventilation needs. Ridge vents, for instance, are highly effective and aesthetically pleasing, while box vents are a common and affordable option. Turbine vents use wind power to enhance airflow, and solar-powered vents offer energy efficiency.
- Calculate the Number of Vents: The number of vents required depends on the size of your attic and local building codes. A general rule of thumb is to have 1 square foot of net free area (NFA) of ventilation for every 150 square feet of attic space. Consult with a roofing professional or local building inspector for accurate calculations.
- Gather Necessary Tools and Materials: You’ll need a variety of tools, including a circular saw or reciprocating saw, a drill, a hammer, a pry bar, a tape measure, a level, a caulk gun, roofing nails, and safety gear such as gloves, safety glasses, and a harness. Also, gather the chosen vent, roofing sealant, and flashing.
- Choose the Right Location: Select a location that provides optimal airflow and is easily accessible. Avoid placing vents near valleys, chimneys, or other obstructions. Ideally, position vents near the ridge or in the upper portion of the roof slope.
- Check Local Building Codes: Ensure your installation complies with local building codes and regulations. Permits may be required for roof modifications.
- Weather Considerations: Pick a dry, calm day for your installation. Working on a wet or windy roof is dangerous and can compromise the integrity of the installation.
Step-by-Step Installation Process
Now that you’ve planned and prepared, it’s time to install the vent. Follow these steps carefully:
- Locate the Rafters: Use a stud finder or tap on the roof surface to locate the rafters beneath the sheathing. Mark the rafter locations with chalk or a pencil. Knowing the rafter location is crucial to prevent cutting into them and to provide secure vent mounting.
- Cut the Pilot Hole: From inside the attic, carefully locate the chosen vent location and drill a small pilot hole through the roof sheathing. This will serve as a guide for cutting from the outside.
- Outline the Vent Opening: From the outside, use the vent’s flange as a template to outline the opening on the roof surface. Ensure the outline is centered over the pilot hole.
- Cut the Roof Sheathing: Using a circular saw or reciprocating saw, carefully cut along the outline, cutting through the shingles and sheathing. Take your time and avoid cutting too deep.
- Remove the Shingles and Sheathing: Carefully remove the cut shingles and sheathing from the opening. Clean any debris from the area.
- Install the Flashing: Flashing is essential for preventing water leaks. Install the flashing around the opening, overlapping the existing shingles. Secure the flashing with roofing nails.
- Position and Secure the Vent: Place the vent over the opening, ensuring it’s properly aligned. Secure the vent to the roof sheathing with roofing nails, driving them through the vent’s flange and into the rafters.
- Seal the Vent: Apply a generous bead of roofing sealant around the vent’s flange, where it meets the shingles. This will create a watertight seal.
- Replace the Shingles: Carefully replace the shingles around the vent, overlapping the flashing. Secure the shingles with roofing nails.
- Final Inspection: Inspect the installation for any gaps or leaks. Apply additional sealant as needed. Ensure the vent is securely fastened and the flashing is properly installed.
Safety Precautions
Roof work is inherently dangerous. Take these safety precautions:
- Use a safety harness and tie-off to prevent falls.
- Wear appropriate safety gear, including gloves, safety glasses, and non-slip shoes.
- Work on a stable ladder or scaffolding.
- Be aware of power lines and other hazards.
- If you are not comfortable working on a roof, hire a professional roofing contractor.
People Also Ask (FAQs)
-
Q: Can I install a roof vent myself?
- A: Yes, if you have the necessary skills, tools, and experience. However, if you’re not comfortable working on a roof, it’s best to hire a professional.
-
Q: How much does it cost to install a roof vent?
- A: The cost varies depending on the type of vent, the complexity of the installation, and labor costs. Expect to pay anywhere from $150 to $500 per vent.
-
Q: What is the best type of roof vent?
- A: The best type of vent depends on your specific needs and roof design. Ridge vents are generally considered the most effective, but box vents and turbine vents are also good options.
-
Q: How often should I inspect my roof vents?
- A: It is a good practice to inspect your roof vents at least once a year, preferably in the spring and fall. Look for signs of damage, such as cracks, leaks, or loose flashing.
-
Q: What is the difference between intake and exhaust ventilation?
- A: Intake ventilation allows fresh air to enter the attic, typically through soffit vents. Exhaust ventilation allows hot, moist air to escape, usually through ridge vents or box vents. A balanced ventilation system requires both intake and exhaust.
-
Q: Will adding a roof vent stop ice dams?
- A: Proper ventilation can significantly reduce the likelihood of ice dams by maintaining a consistent attic temperature. However, it may not completely eliminate the risk in extreme conditions.
Read More Also: 7 Transformative Spring Cleaning Tips for Your Garage + FAQs
Conclusion
Installing a roof vent on an existing roof is a worthwhile investment that can improve your home’s energy efficiency, prevent moisture damage, and extend the lifespan of your roofing materials. By carefully planning and following the steps outlined in this guide, you can successfully complete the installation. Remember to prioritize safety and consult with a professional if you have any doubts or concerns. A properly installed roof vent will provide years of reliable ventilation, keeping your attic dry and comfortable.