
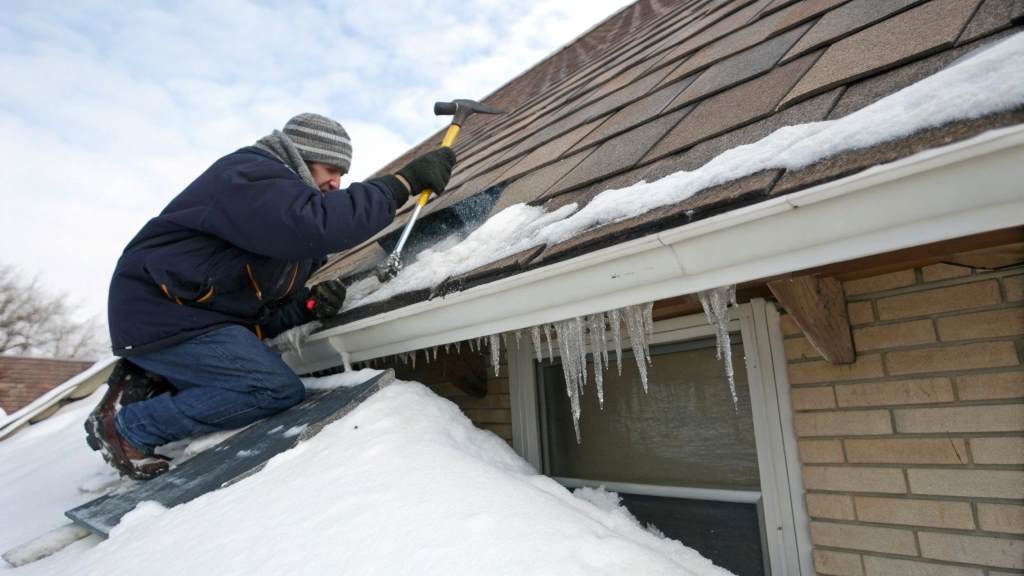
Cold weather can wreak havoc on your home, and your roof often bears the brunt of it. Roof vents, crucial for proper ventilation and temperature regulation, are especially susceptible to damage during winter months. A cracked roof vent can cause water leaks, structural decay, and skyrocketing energy bills. Addressing this issue promptly is vital to maintaining the safety and comfort of your home.
Fixing a cracked roof vent in cold weather is challenging but entirely doable with the right approach. This comprehensive guide covers every aspect of the process, offering practical steps, tools, and expert insights to help you tackle the problem effectively, even in freezing temperatures.
Why Roof Vents Crack in Cold Weather
Roof vents are exposed to various environmental factors, and the cold intensifies their vulnerability. Understanding the causes of cracks helps you prevent similar issues in the future:
- Material Weakness: Plastic and rubber components lose elasticity in freezing conditions, becoming brittle and prone to cracking.
- Thermal Expansion and Contraction: Sudden temperature fluctuations cause vent materials to expand and contract, leading to stress fractures.
- Ice Accumulation: Snow and ice buildup adds weight and pressure, straining the vent structure.
- Aging Materials: Over time, vents degrade due to prolonged exposure to sunlight, moisture, and seasonal changes.
Consider investing in metal roof vents, which are more resistant to extreme weather conditions and have a longer lifespan.
Signs of a Cracked Roof Vent
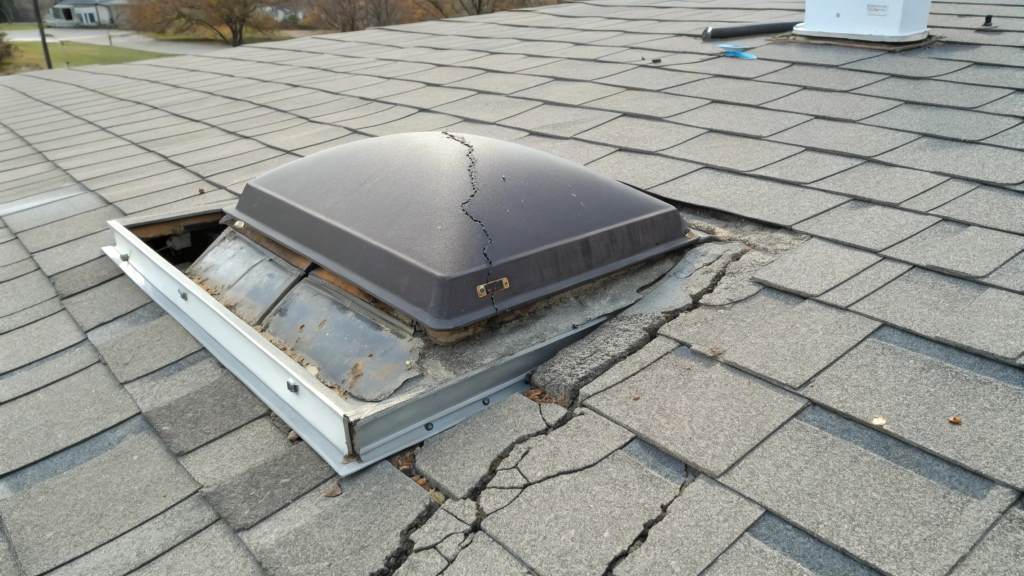
Detecting a cracked roof vent early can prevent costly repairs down the line. Here are the most common indicators:
Visual Inspection
Look for visible cracks, warping, or discoloration on the vent. Use a flashlight to examine hard-to-see areas.
Water Damage
Leaks or water stains on ceilings and attic walls often signal a compromised roof vent. If left unchecked, this can lead to mold growth and structural weakening.
Temperature Irregularities
Noticeable drafts or uneven heating in your home might indicate a breach in the roof vent, allowing cold air to seep in.
Noisy Vents
Unusual whistling or rattling sounds during high winds can suggest a cracked or loose vent.
According to a survey by HomeAdvisor, nearly 25% of winter roof damage cases involve compromised ventilation systems. Regular checks can significantly reduce repair costs.
Can You Repair a Cracked Roof Vent in Cold Weather?
Absolutely! While cold weather presents unique challenges, modern materials and techniques make it possible to repair a cracked roof vent even in freezing conditions. Here’s why:
- Advancements in Sealants: Specialized cold-weather roofing sealants can adhere effectively even in sub-zero temperatures.
- Durable Temporary Fixes: Products like weatherproof tapes and tarps provide immediate relief until a permanent solution is feasible.
- Improved Tools: Heat guns and portable blowers help warm the area, making repairs easier to execute.
That said, timing is critical. Repairs should ideally be conducted during milder winter days to ensure optimal results.
Tools and Materials Needed
Preparation is half the battle. Having the right tools and materials ensures a smooth repair process. Here’s what you’ll need:
Essential Tools
- Safety Gear: Gloves, goggles, and a sturdy harness for rooftop work.
- Ladder: Ensure it’s stable and positioned securely on dry ground.
- Flashlight or Headlamp: For thorough inspection, especially in shaded or low-light conditions.
Materials
- Cold-Weather Roofing Sealant: Choose a flexible, waterproof sealant designed for freezing conditions.
- Replacement Roof Vent: If the crack is beyond repair, a new vent is required.
- Roofing Tape: Ideal for quick, temporary fixes.
- Screws and Screwdriver: To secure loose or detached components.
Step-by-Step Guide to Fixing a Cracked Roof Vent in Cold Weather
Step 1: Assess the Damage
Begin by conducting a detailed inspection. Identify the size, location, and severity of the crack. For small cracks, repairs are straightforward. However, extensive damage may necessitate a complete vent replacement.
Step 2: Prepare the Work Area
Remove any snow, ice, or debris around the vent using a soft brush or shovel. Avoid using metal tools, as they can scratch or further damage the roof.
Step 3: Warm the Vent and Surrounding Area
Use a heat gun or hairdryer to gently warm the cracked area. This step helps the sealant adhere properly by removing frost and improving material flexibility.
Step 4: Apply the Sealant
- Use a caulk gun to apply the sealant directly onto the crack.
- Spread it evenly with a putty knife or your gloved finger.
- Allow the sealant to dry according to the manufacturer’s instructions (typically within 24–48 hours).
Step 5: Reinforce the Vent
Secure the vent with roofing screws to ensure stability. Tighten existing screws if they’ve become loose over time.
Step 6: Replace the Vent (if necessary)
If the crack is too large for a sealant fix, remove the damaged vent entirely:
- Unscrew and carefully detach the old vent.
- Place the new vent in position, ensuring a snug fit.
- Fasten with screws and seal the edges to prevent leaks.
Step 7: Perform a Final Check
Once repairs are complete, inspect the vent for any gaps or missed spots. Ensure all sealant is properly cured before exposing the area to snow or rain.
How to Prevent Future Roof Vent Cracks
Prevention is better (and cheaper) than cure. Follow these practices to avoid future issues:
Install High-Quality Vents
Metal vents, especially galvanized steel or aluminum, are far more durable than plastic options. They resist cracking, warping, and weather-related damage.
Apply Protective Coatings
Use weatherproof coatings to shield vents from UV rays and moisture. These coatings enhance material longevity and reduce wear and tear.
Improve Attic Ventilation
Proper ventilation prevents ice dams and excessive condensation, both of which contribute to vent cracking. Install ridge vents or soffit vents for optimal airflow.
Common Mistakes to Avoid
- Ignoring Small Cracks: Minor damage can quickly escalate if left unaddressed. Inspect your roof vents regularly.
- Using Inappropriate Materials: Ordinary caulk or adhesive won’t provide the necessary durability in cold weather.
- Overlooking Safety Precautions: Always wear appropriate safety gear and avoid working in adverse weather conditions.
The Cost of Repairing a Cracked Roof Vent
Repair costs depend on the extent of the damage and whether you opt for DIY or professional services. Here’s a breakdown:
| Repair Type | Estimated Cost ($) |
|---|---|
| DIY Sealant Repair | 15–75 |
| Professional Repair | 200–500 |
| Full Replacement | 60–300 (DIY), 400–800 (Pro) |
Investing in durable materials upfront can significantly reduce these expenses over time.
FAQs
What type of sealant is best for cold weather roof repairs?
Look for a sealant labeled “cold-weather” or “extreme weather,” as these are designed to adhere even in freezing conditions.
Can I perform roof vent repairs during snowfall?
It’s not advisable. Snowfall can make the roof slippery and compromise the effectiveness of adhesives. Wait for clear weather.
How often should I check my roof vents for damage?
Inspect them every six months or after severe weather events to catch problems early.
What are the risks of delaying roof vent repairs?
Delays can lead to water leaks, mold growth, and even structural damage, which are far costlier to address.
Is it worth hiring a professional for minor vent cracks?
If you’re unsure about the repair process or lack the necessary tools, a professional can provide peace of mind and lasting results.
Conclusion
Fixing a cracked roof vent in cold weather is a manageable task when approached with the right tools, materials, and techniques. Early detection and timely action are key to preserving your home’s structural integrity and avoiding costly repairs. By following this guide, you can confidently address vent damage and safeguard your home during the harshest winter months.
You May Like
Can You Use Push Fit Fittings on Copper Pipe? What You Need to Know